


Properties & Qualities
Application
Architecture, Art, Lighting, Other
Qualities
2D, 3D, Textured / tactile, Translucent
Colour
Other
Sample Information
Date of creation
01/23/2023
Dimensions
30cm x 30cm x 1.2cm
Weight
2kg
Process & Production
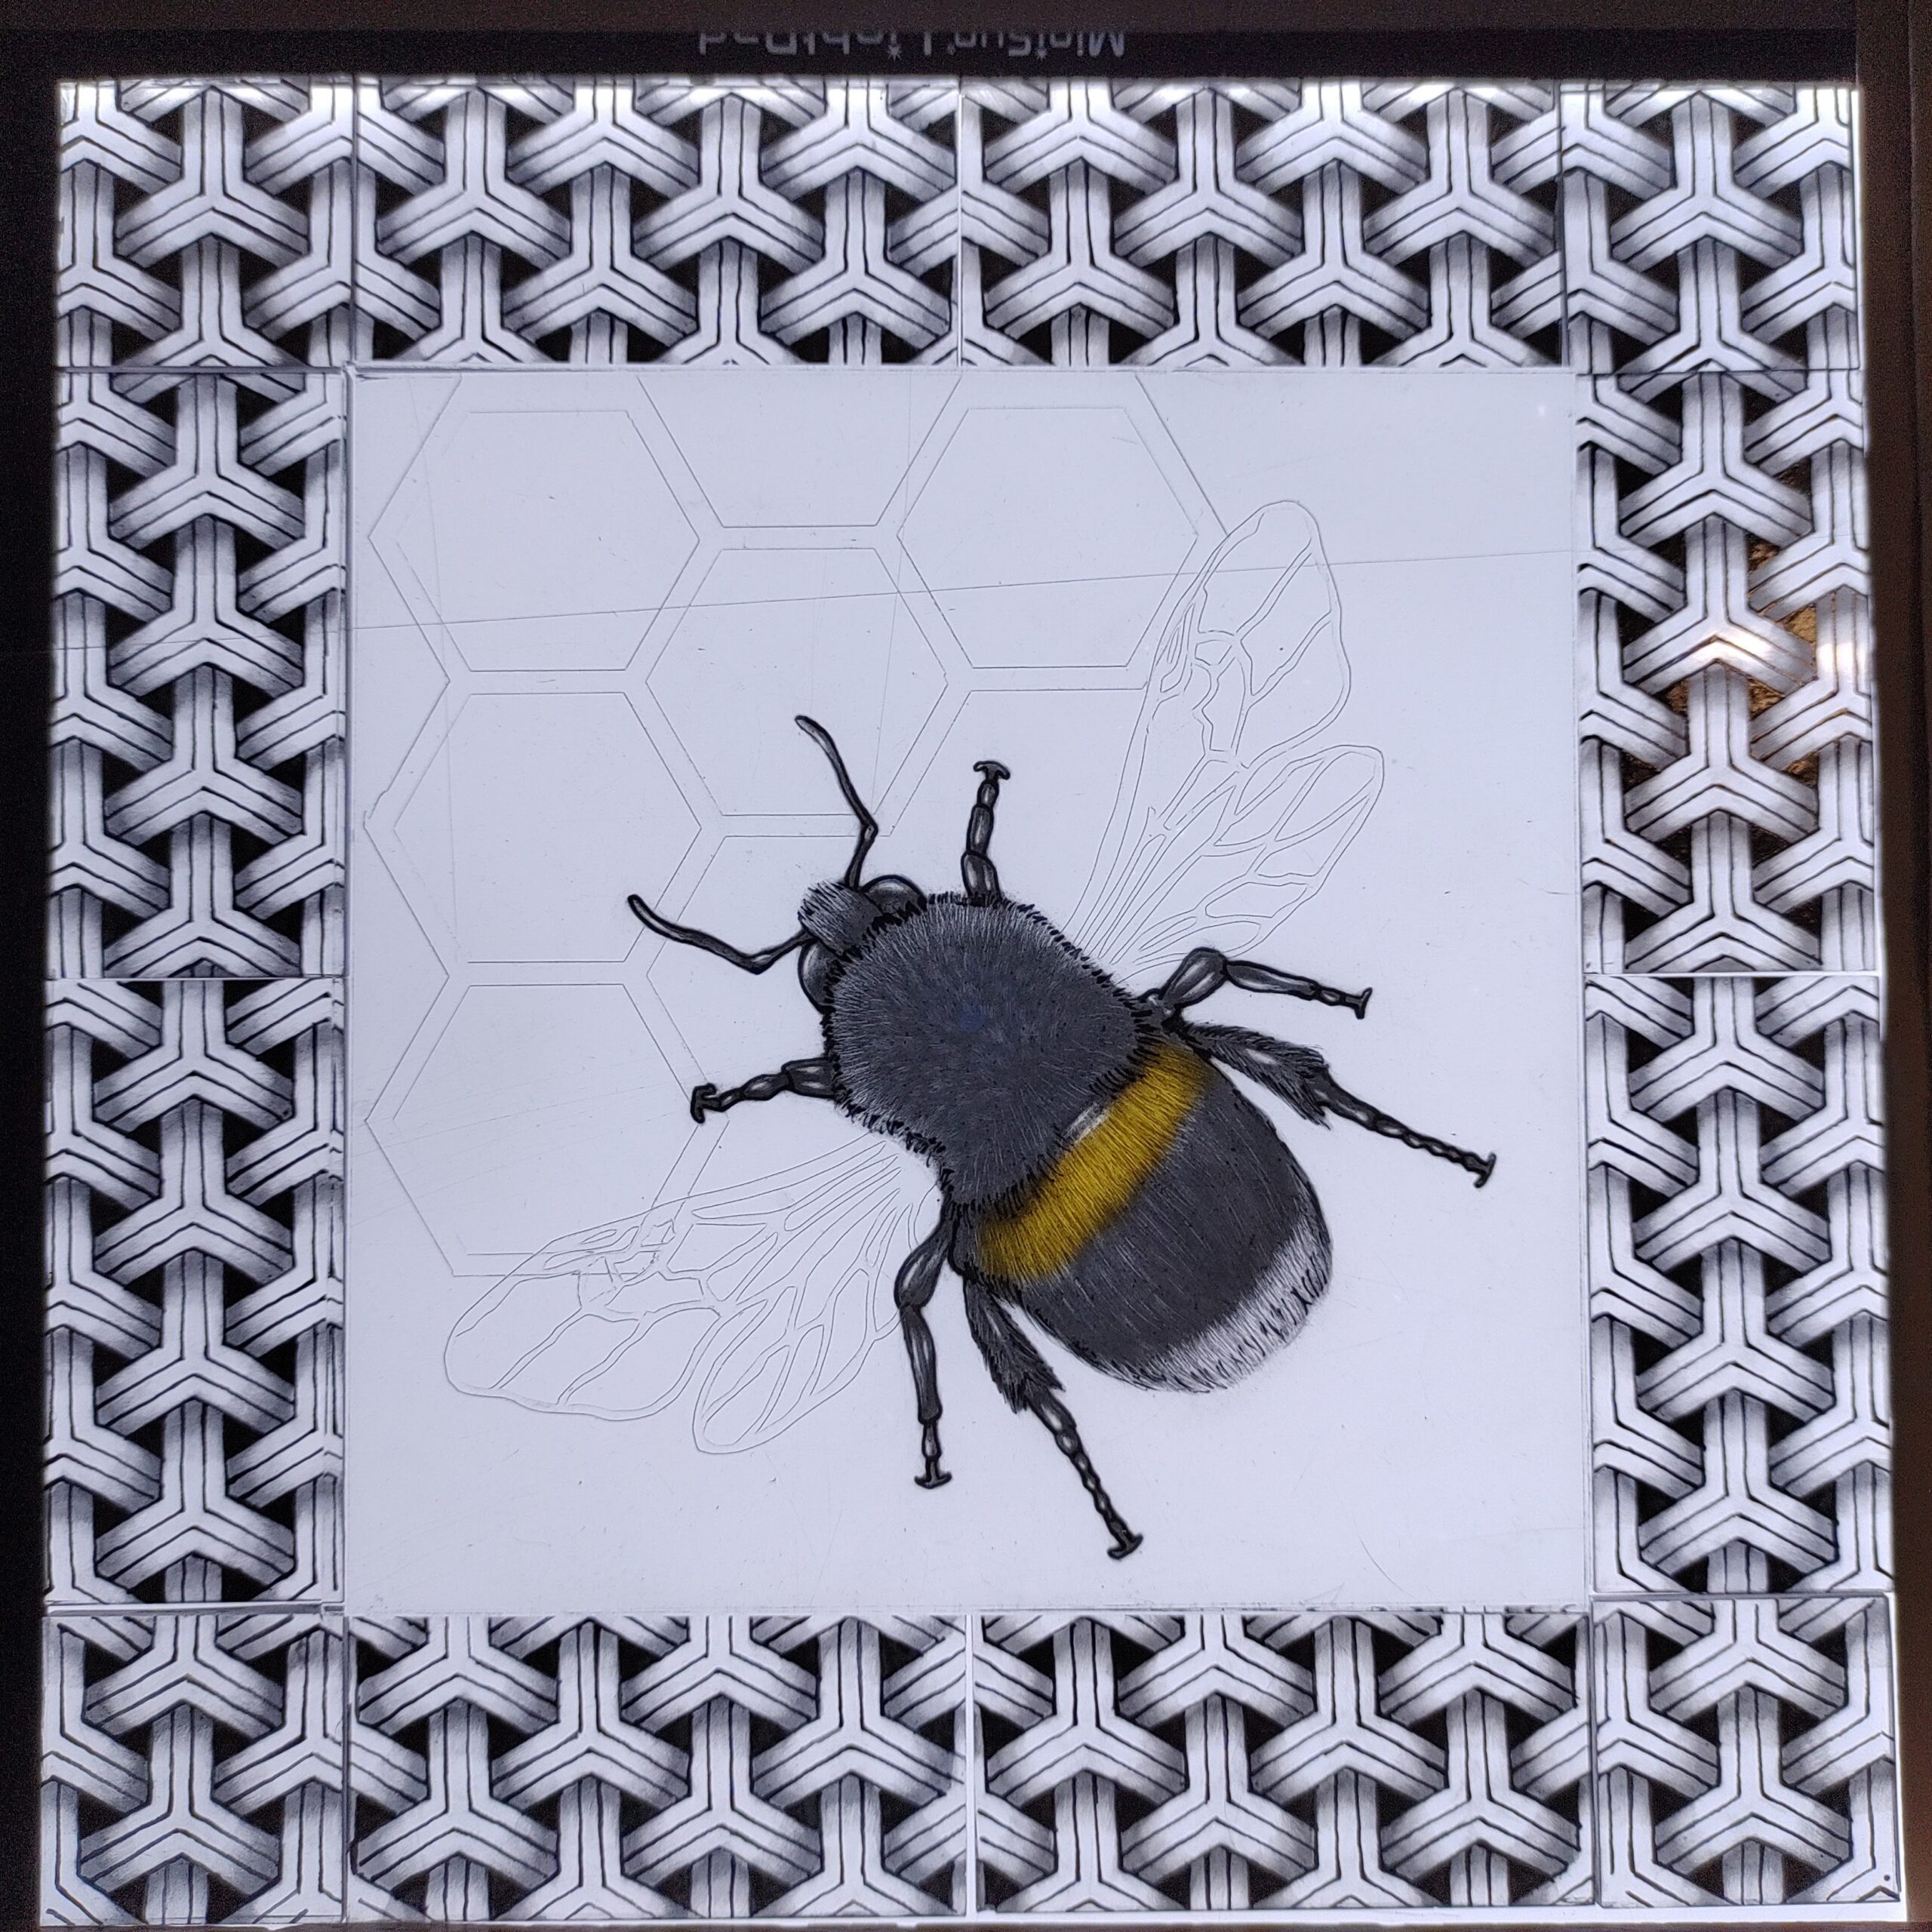
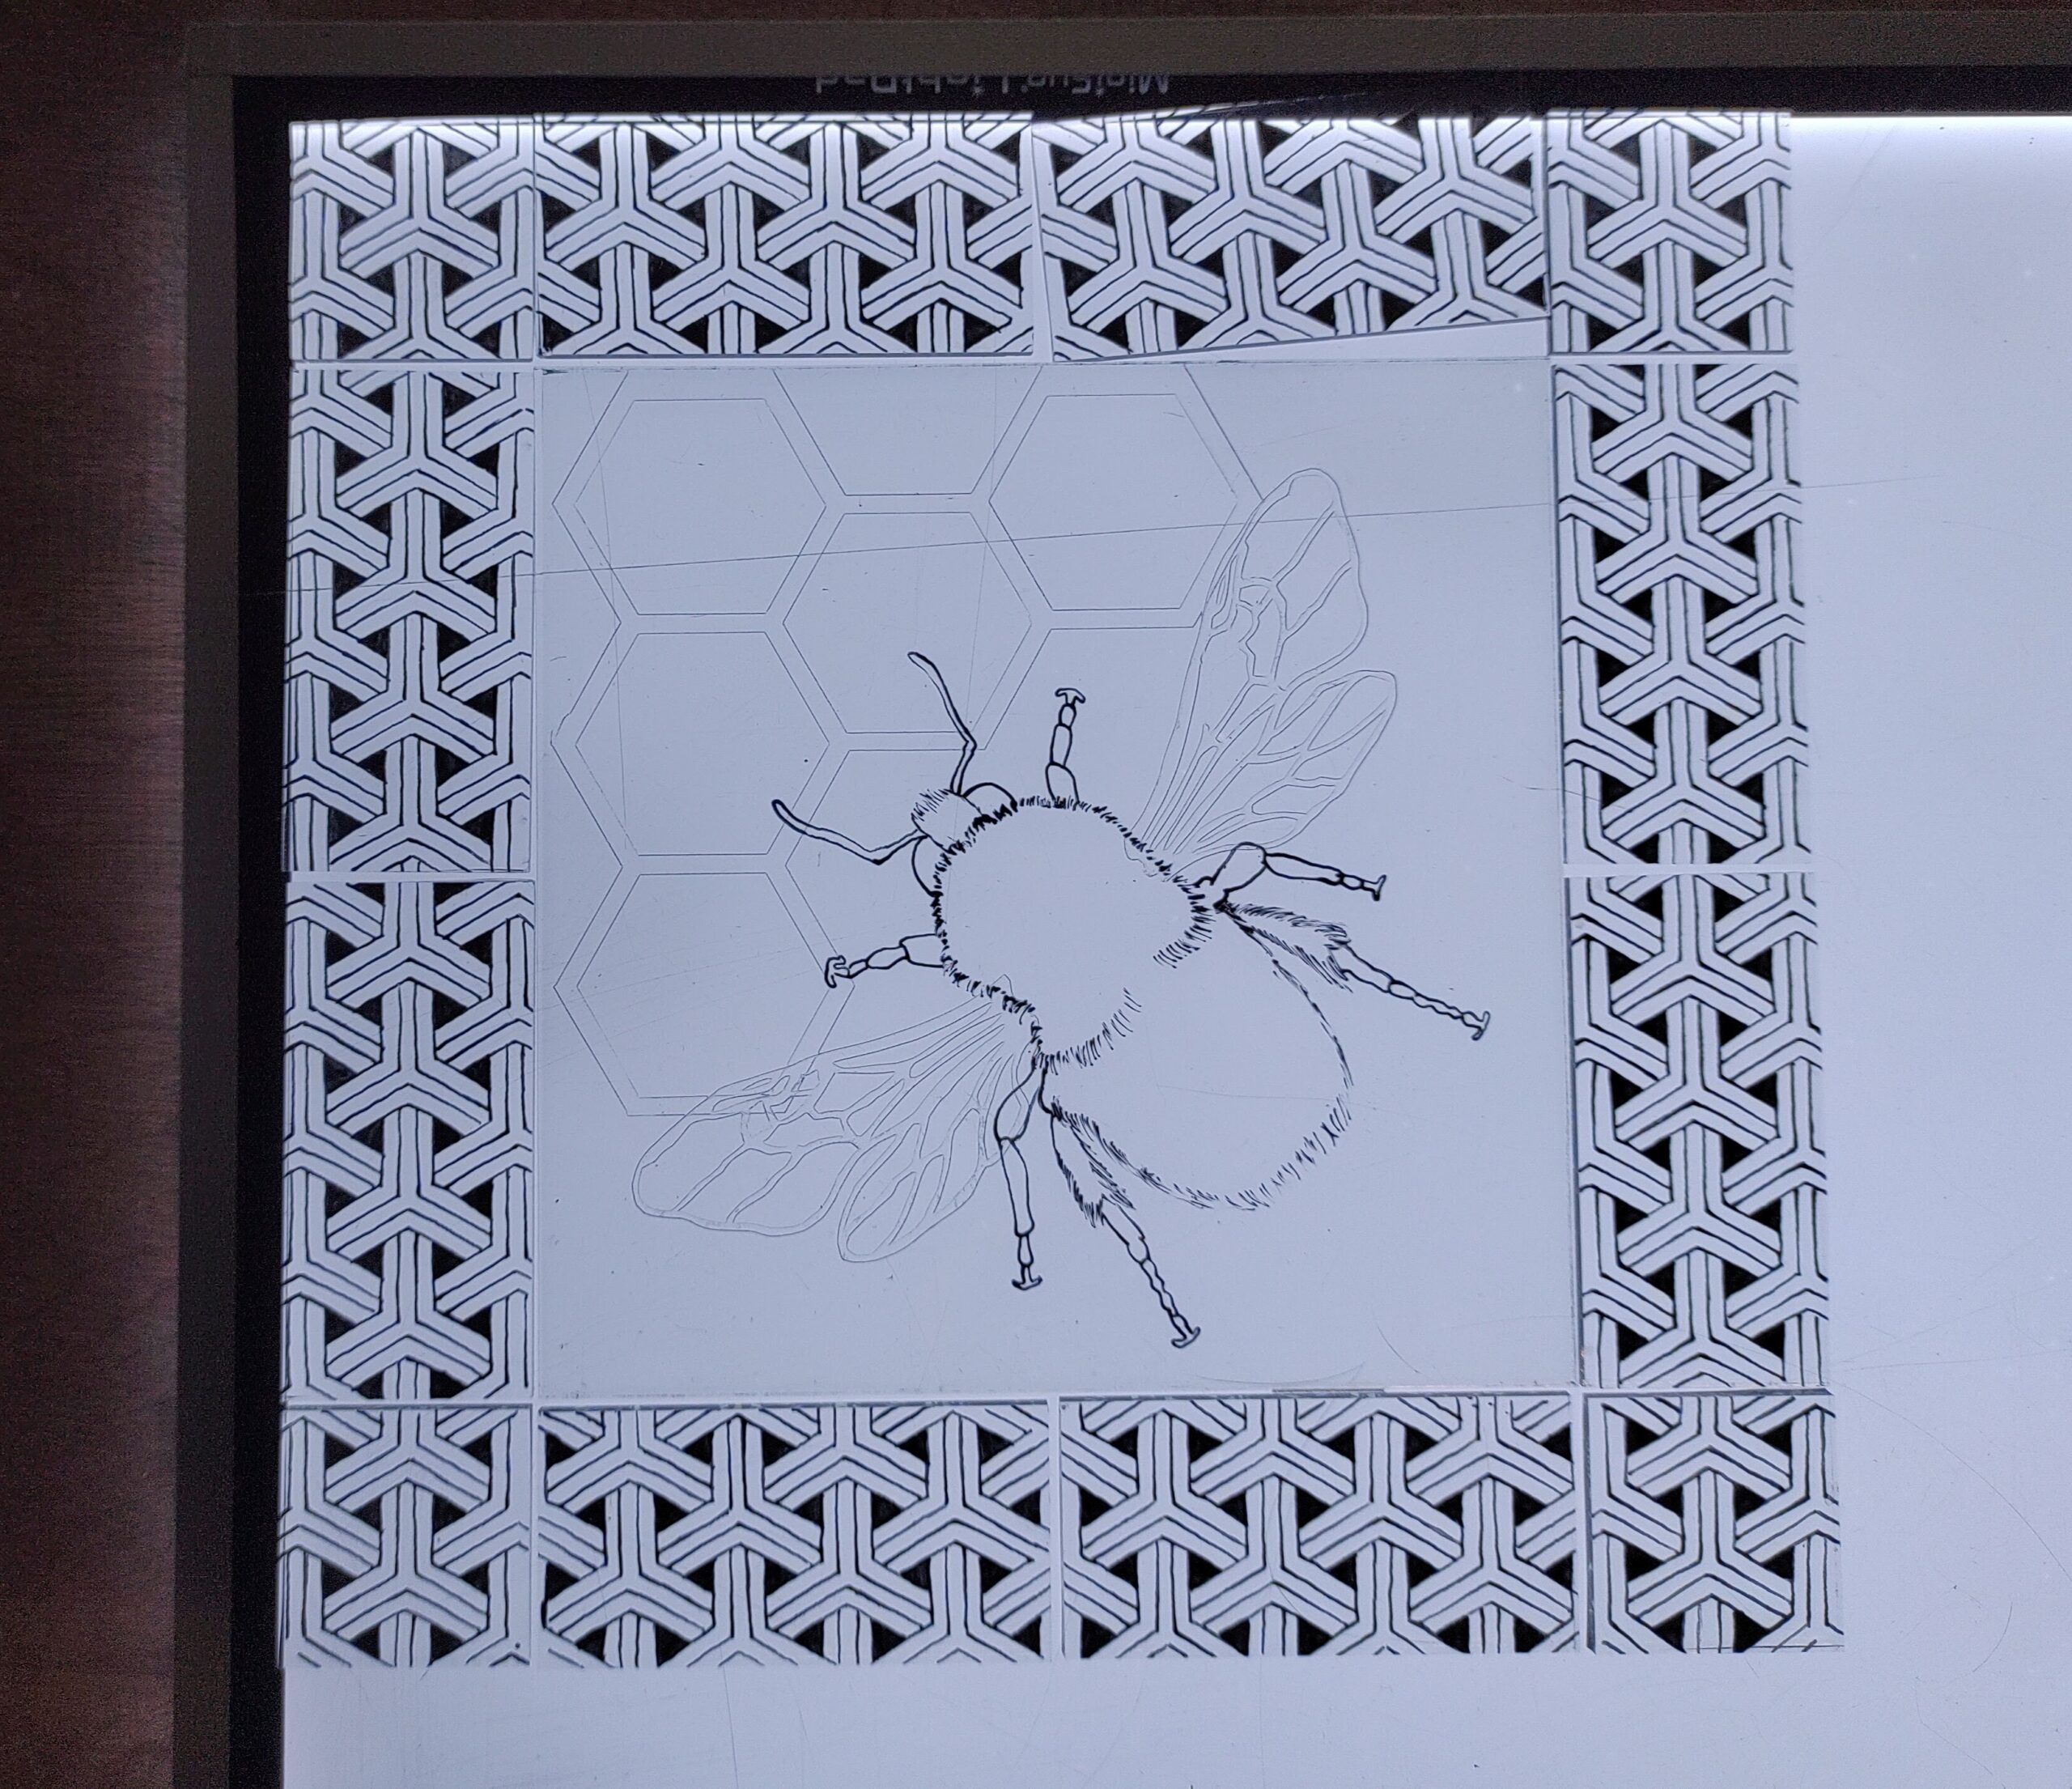
| The etched relief of the hive cells framework and the bees wings, demonstrated in entry #4, form the physical depth of the design, whereas further depth is created by using traditional high fire painting and silver staining methods. These will be embellished in entry #6. This entry demonstrates the process of painting and staining. I mostly use Reusche glass paints, but have a collection of other makes, all of which give me a varied palette to achieve various design outcomes. This design also uses silver stain, which was Oster’s Ancient Walpol. I used Reusche Tracing Black paint to paint the lines of the central bee and border designs. For the bee, I used a sable 00 brush, which allows good control of the brush tip and holds enough paint to allow good steady lines. For the hive border I used a pen nib. The border paint was mixed using oils, which results in a deeper black once fired, and is good for fine straight lines when The stain is applied to the none paint side so that the stain has good adhesion to the glass, and without any paint forming a barrier. The stain dries looking like a brown powder, and unlike glass paints or enamels, it retains this appearance after firing. Once the glass is cooled, the stained area is washed to remove the powder residue and reveals the golden yellow beneath. The bee was painted on the reverse side of the hive cell piece of etched glass. This created a 4mm depth |
Recipe Details
The paint is Reusche tracing black and I used two mediums for mixing, one for the bee and another for the weave border.The bee medium was water added to the paint and a small amount of gum Arabic, to assist adhesion. This is mixed using a palette knife. It is ready to use when it is free of any powder traces and has a creamy consistency. The paint can be allowed to dry out between uses and can be reconstituted by added drops of water and remixed. The weave border was a combination of clove and lavender oils mixed into the paint – no gum Arabic is used as the oils help the adhesion. The mix starts to look deep black and moves like ink.
The silver stain is mixed with water only. It too achieves a creamy feel with no powder residue.
Credits
Craft Maker
Steven Graham
Library Contributor
Steven Graham
Photographer
Steven Graham

Other materials from this practitioner


Other Materials
-

Bio-composite pastel #39
Bio-material – solid – textured – experimental
-

Masking with paper and engobe
-

Oxidated ring
-

Copper Electrolysis Experiments
Can we use foil and electrolysis to make pattern in copper?
-

Embroidered stories
Textile, Exploration, Fixing
-

Driftwood and garnet necklace
-

Raku fired morphology collection object #3
Form variations with stoneware clay
-

UV Printed Ceramic Tile ‘ Fans’
UV Printed Ceramic Tile ‘ Fans’
-

UV Printed Tile ‘Conical Peach’
UV Printed Tile ‘Conical Peach’